VizIoT Notifications
In the article on remote control of the ESP8266 microcontroller, we gained conceptual knowledge and practiced the basic concepts of data transmission to the server using the MQTT protocol. We also implemented the capability to create a weather station based on the BME280 sensor using the HTTP protocol and learned how to display data sent from devices using widgets.
Now, we will explore the possibility of adding and managing notifications, as well as connecting to the VizIoT Telegram Bot.
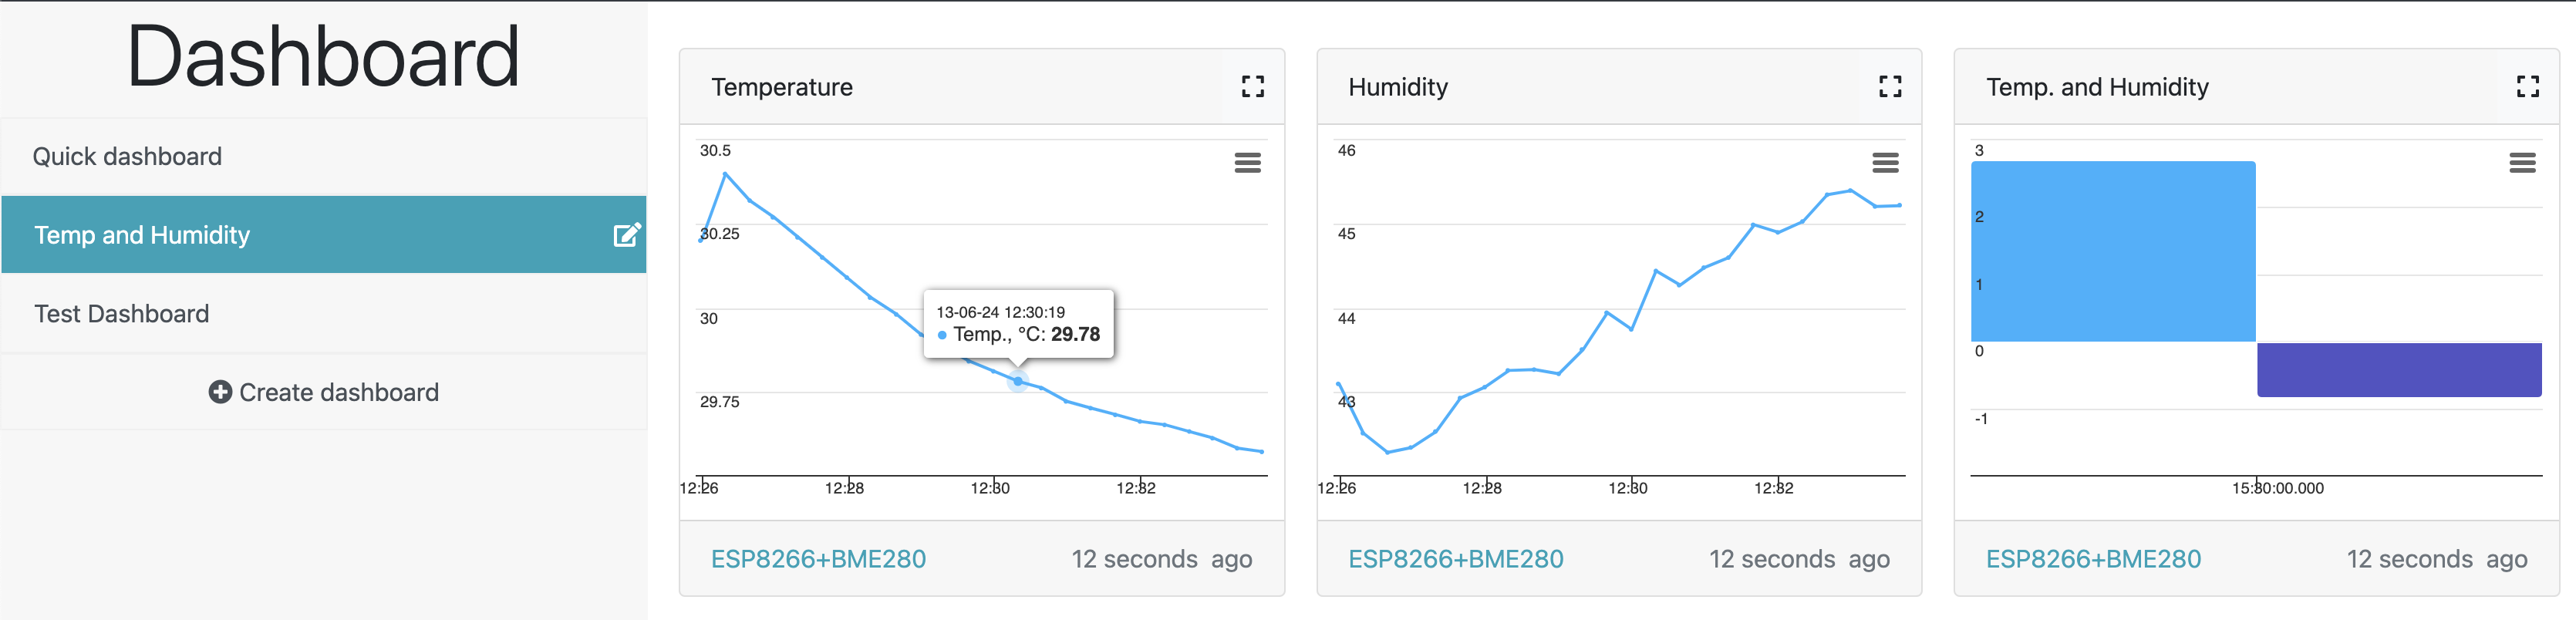
For this, we will use the device assembled in the article Connecting the BME280 Sensor to ESP8266 and Creating a Weather Station with VizIoT, which needs to be connected to the Wi-Fi network. Ensure that dynamic graphs with current indicators transmitted by the BME280 sensor appear on the widgets.
Connecting to the VizIoT Telegram Bot
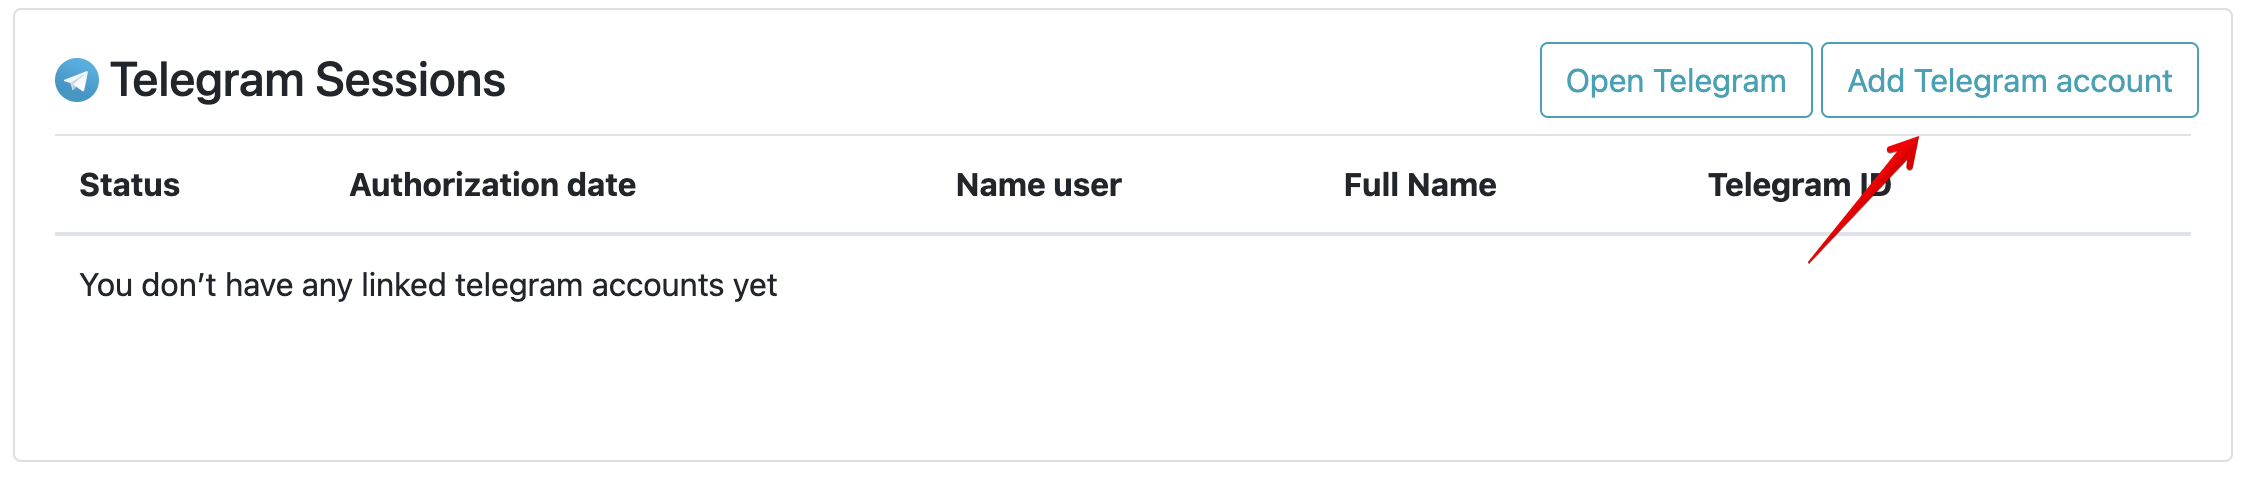
To do this, go to the "My Profile" tab and click "Add Telegram account."
Then log into your Telegram account and open VizIoTBot. In the bot's start window click start.
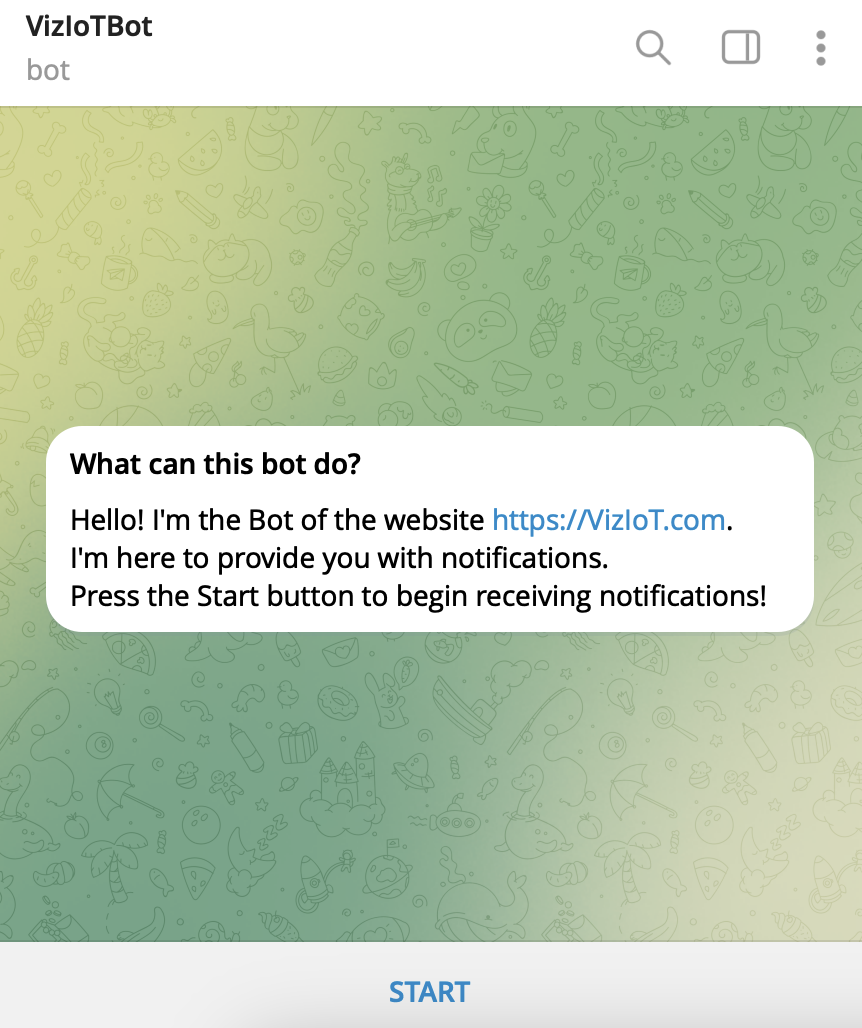
That's it! You have linked your Telegram account to your VizIoT account. Now we can proceed to set up notifications.
Setting Up Notifications
Go to the Devices tab, then click on the bell icon on the device where you want to set up notifications.

Click the "add notification" button.

Setting Up Connection Control Notifications
Below is an example of setting up notifications for loss of connection with the device in the Telegram bot. In the notification constructor window, change the control type to "Communication loss."
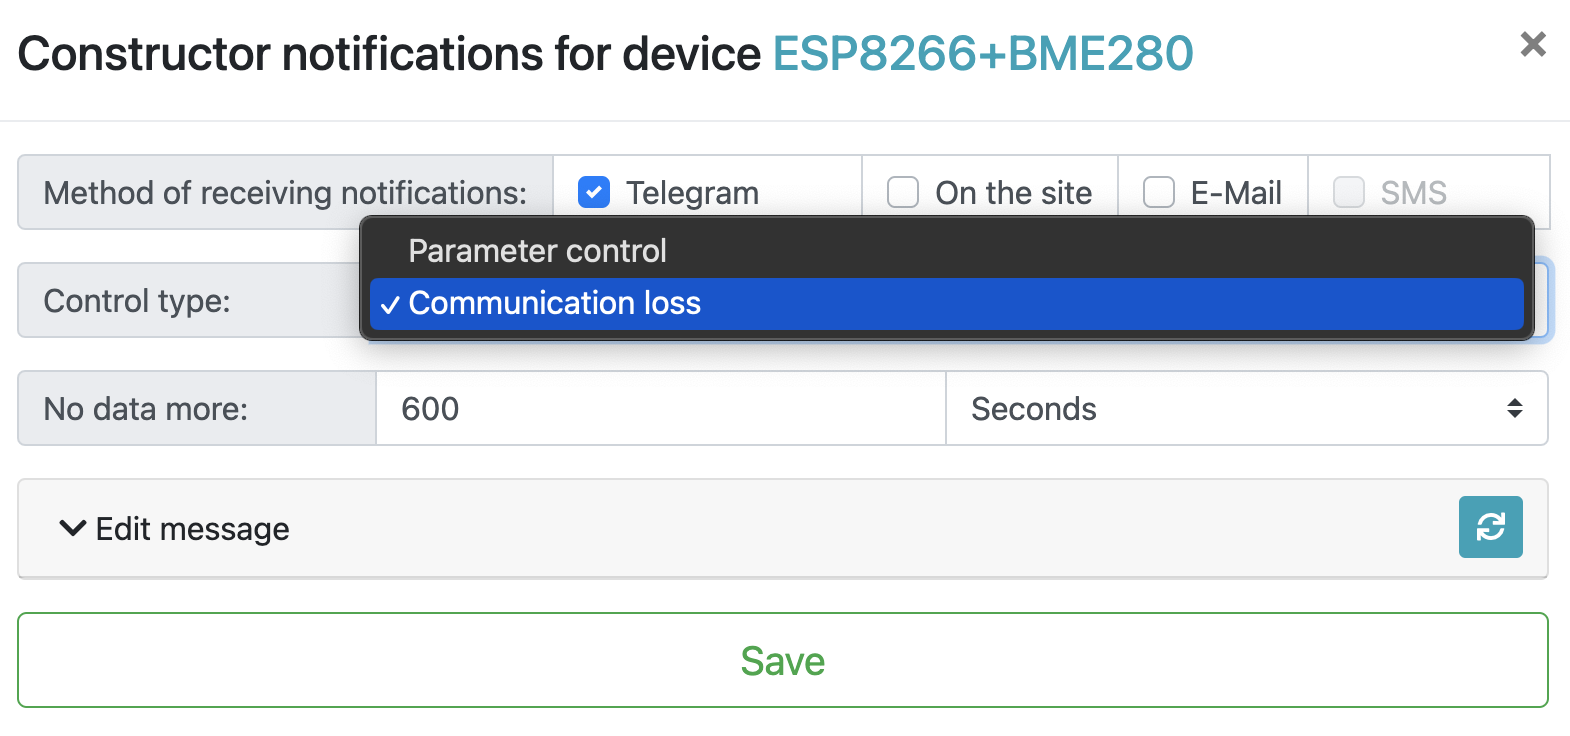
- the time when the device disconnected from the network,
- the name of the device itself,
- the total time of the connection loss.
Set the following parameters in the constructor settings:

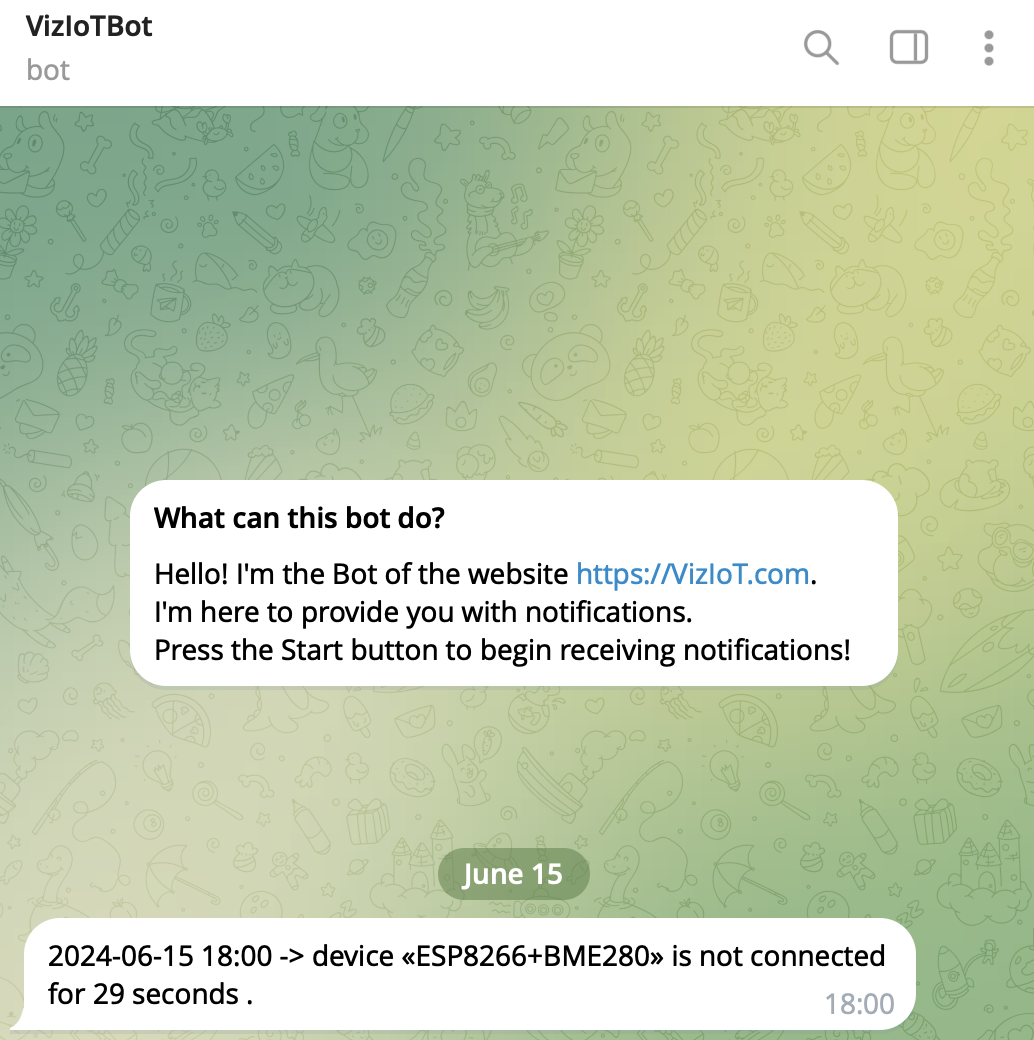
An example of a "Communication loss" notification in the Telegram bot looks as follows:

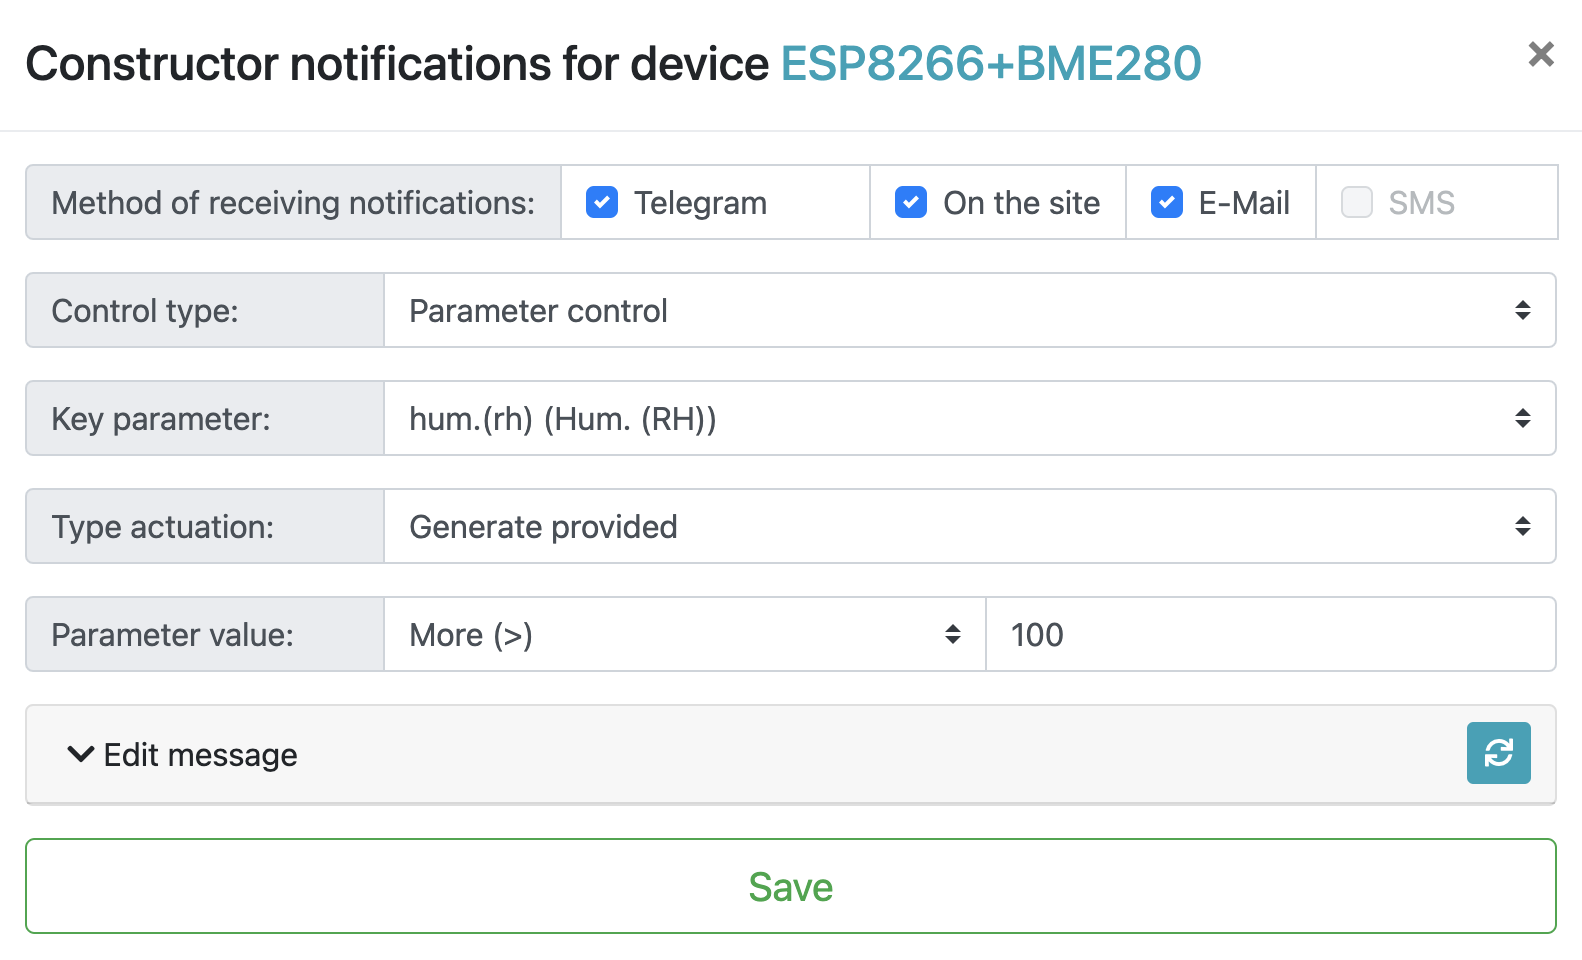
You can also set up notifications for device parameter control, such as temperature and humidity. Three types of triggers are available:
- Generating a notification when the parameter value enters a range of values.
- Generating a notification when the parameter value exits a range of values.
- Generating a notification when a condition is met.
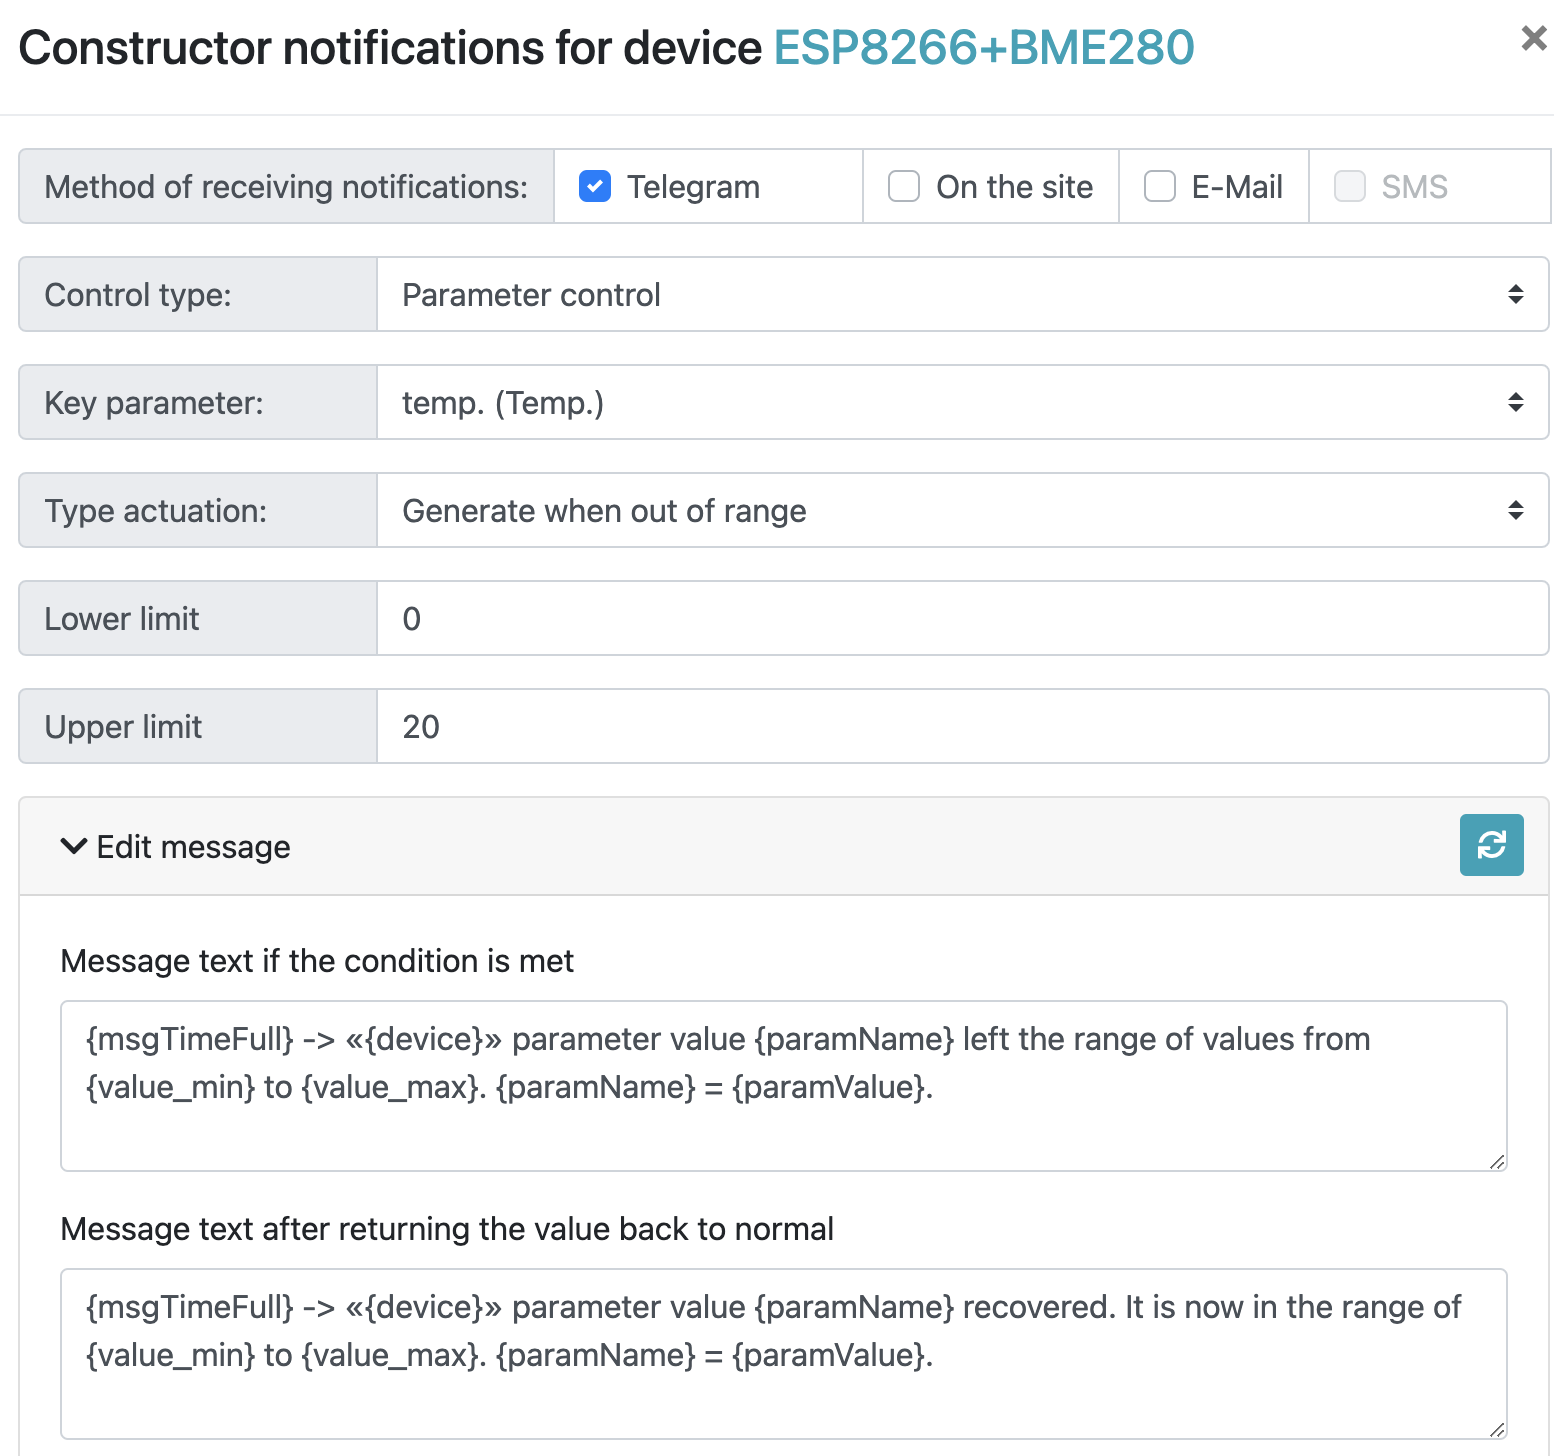
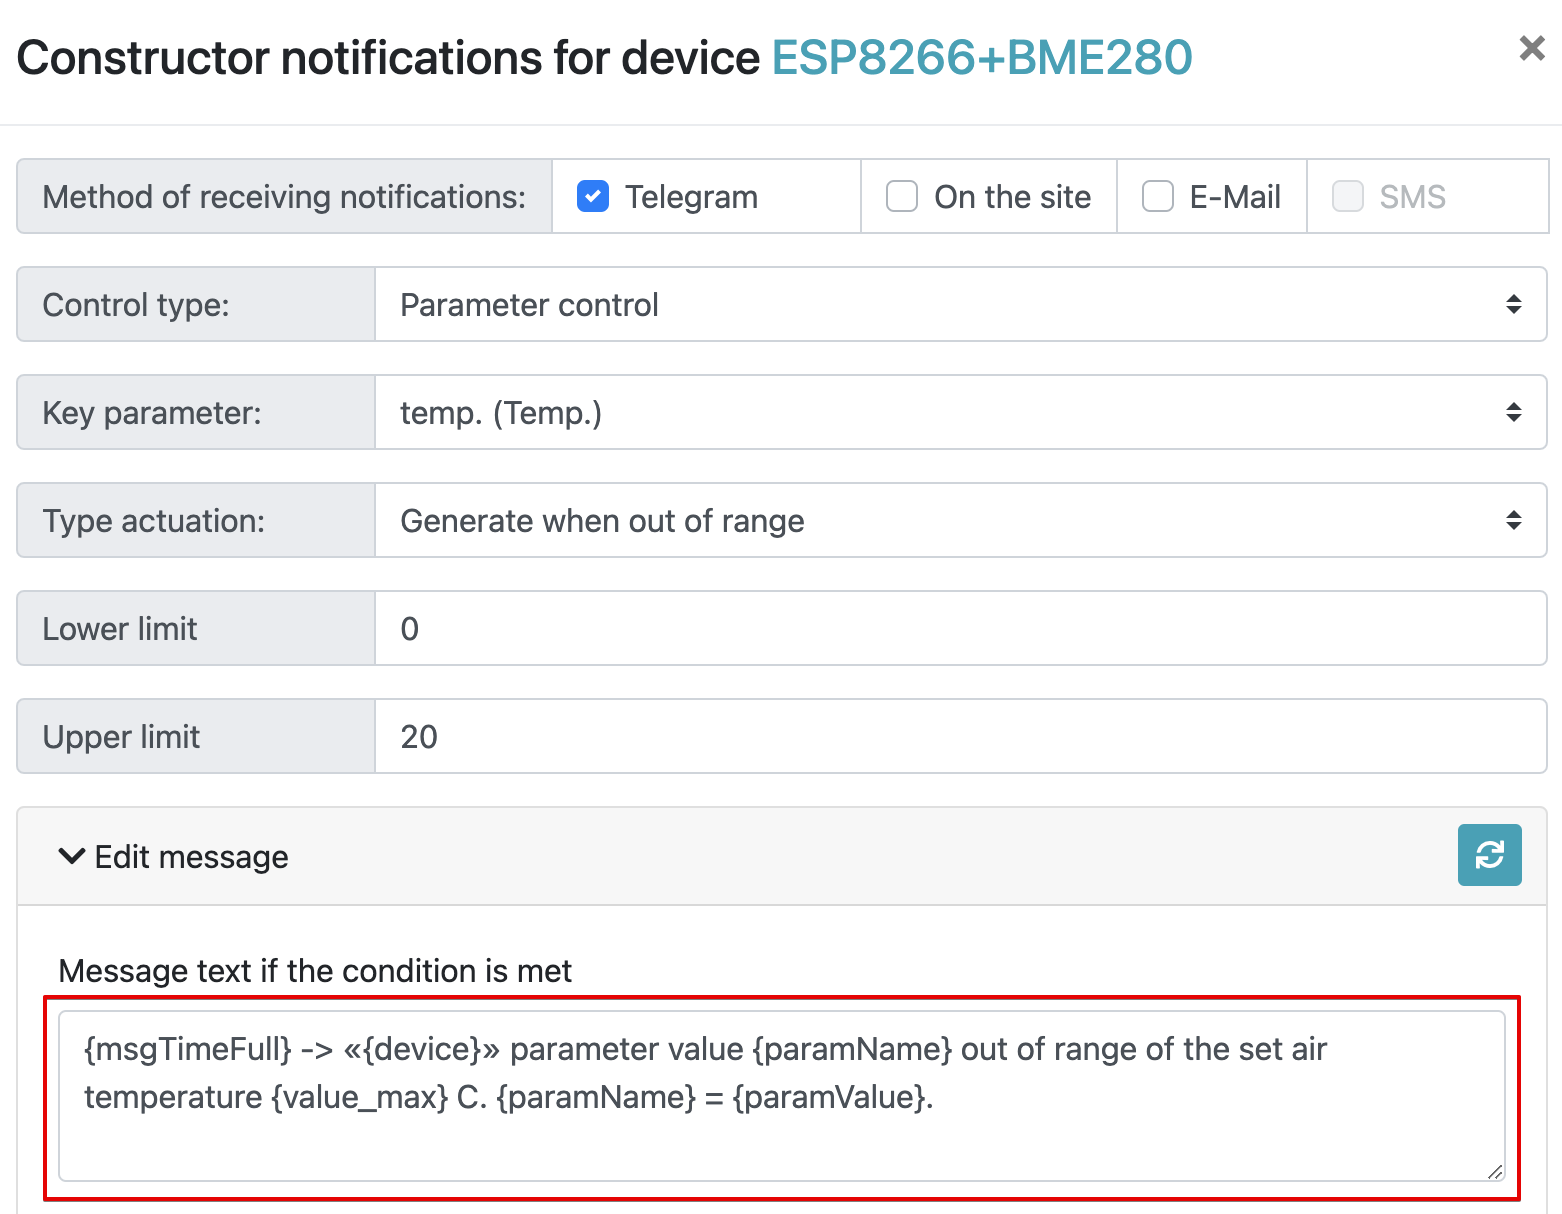
Setting Up Parameter Control Notifications
Let's consider an example of setting up an event trigger when the temperature exceeds 20 °C. The configured constructor looks like this:
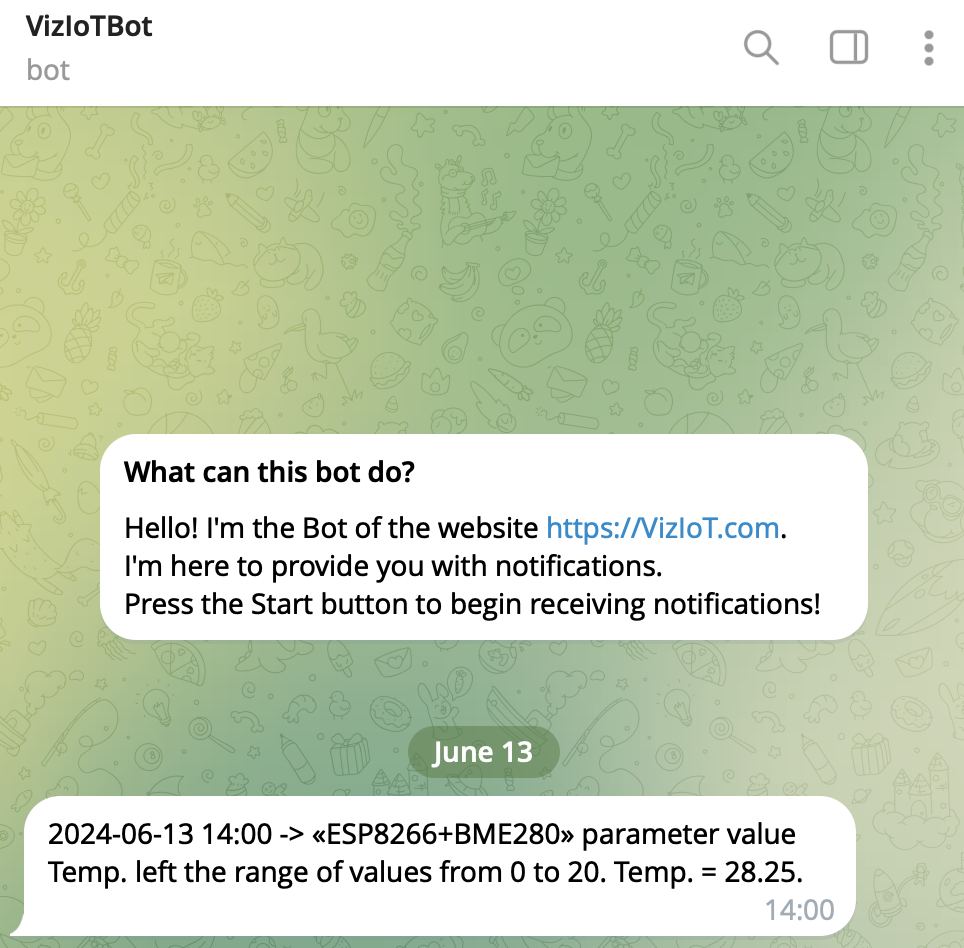
After saving the settings, a message was received in VizIoTBot stating that "_the parameter value Temp. left the range of values from 0 to 20. Temp. = 28.25."
The notification text can be customized by rephrasing sentences and applying/removing keywords, for example:
As a result, we get the notification in the following form:

Thus, the above algorithms helped us master the basic knowledge of setting up notifications on the VizIoT website. There's more interesting stuff to come.